Thursday, February 28, 2013

Happy Birthday Mom!!

Today is my mom's birthday. I hope she has a great day. I have the day off to spend with her and we are going out to the new Brazilian Steakhouse that sounds amazing!

So 
HAPPY BIRTHDAY MOM

Wednesday, February 27, 2013

Oh Baby


Here is another page sample for you all that will be displayed in the store as soon as we get our new shipment of American Craft paper. The duck paper and the two cards in the bottom right corner are Crate Paper from the Little Boy Blue collection. When we get our new shipment in, this paper may be moving from the American Craft section to the Baby section, so this page will ultimately end up in the Baby Boy section when that happens.


Paper: Crate Paper Little Boy Blue collection
Cuttlebug Swiss Dots Embossing Folder
MFT Dienamics Mix & Match Banners
Alphabet Cling Stamps
Twine, Ribbon
I think this page is very fitting for the time because EVERYONE I know is pregnant now! Maybe it'll be going into a baby shower gift sometime soon. We'll see...

Thanks for stopping by!
Have a great day

Monday, February 25, 2013

Go Team


I am still on a page sample kit for the store, and here's what I came up with on Saturday. You'll be able to find it in the "School" section of the store.

When it's made its rounds hanging on the wall in the store I'll take the page back for my younger brother's senior scrapbook (which I still have to start, but he's only a junior and I have a large amount of paper and embellishments already for this project) for one of his Special Olympics pictures.


Supplies:

Crate Paper school spirit "Pep Rally"
"Champions" diecut available at Picture This
Cuttlebug Embossing Folder "Swiss Dots"
MFT Die-namics "Mix & Match Banners"
Colored Cardstock
Diecut Letters available & cut at Picture This


I hope you enjoyed that post today!


Saturday, February 23, 2013

Heidi Grace Thanks!

Here is another card that I  made for my card selection for the craft fair. This paper is also older, its Heidi Grace. I tied a ribbon between the front sheet of paper and the inside sheet of paper to make a closure for the card. I also stamped Thanks! inside a circle design in the paper.


Thanks! for stopping by.

Thursday, February 21, 2013

Birthday Banner Card

I've had this paper in the background for quite some time, and I could never figure out what to do with it because there are no little girls in my life to make cards for. But I decided to make a few cards the other day that were girl friendly because my mom is going to be in a craft fair and asked if she could sell some of my cards at her Watkins table. So I decided I needed to add some variety to my card selection. 

Here's a few things I made:


Paper: Pebbles Ever After " Royal Banner"
Heidi Grace (blue)

Enjoy your day!


Tuesday, February 19, 2013

Bob

Whilst I was working in my scrap room, Bob was working on something of her own: trying to feed herself. Though she had already been fed, she was on a mission to get into that food bag. Most of the time her food is kept in that container to the right, but the bag of food that I have was too much to fit into the container, so there it sits, ready for Bob to get at it. And she has before too. I walked into my scrap room where her food is the first day I purchased that bag of food and she had pellets of food laying all over the floor. Well, she was hungry today and she was on a mission.


Here she was trying to eat at the pellets in the back of the bag that she already got out.


And then she was King Kong and stood herself atop the food container to get a better look at the situation.

What a silly kitty.

Have a great day!

Sunday, February 17, 2013

Recycled Gift Bag Tutorial

When I was in Singapore visiting my soon-to-be-sister-in-law in December, we went shopping. It's one of the favorite past times for Singaporeans, plus how can you be in a foreign country and not do a little shopping while you sight see? Well we went to a place called Haji Lane that was in the Middle Eastern section of Singapore. There was a huge mosque that you could hear chanting coming from (SO! awesome), several little Indian restaurants, and lots of stores with handmade souvenirs. At one of the shops I purchased a souvenir and it came in a nifty little gift bag like this one:


The woman who handed it to me told me it was handmade from recycled paper. So of course I made sure to keep it and bring it home so that I could recreate it...and that I did. I took it apart at its seams and made a pattern for myself and I think I've made about 75 of them by now. They're very simple to learn how to make once you get them down.

To make a Recycled Gift Bag you will need:
A scoring board with score tool
A pretty magazine or old book page (8.5x11") (you can just rip it out of the book, the edge does not have to  be straight because you will be folding this edge over, just be sure it is still roughly 8" wide)
A hole punch
Tape and a tape runner
Curling Ribbon


First, lay your paper down horizontally on your score board.
Score at 2.25", 3", 3.75" & at 7.5", 8.25", 9"


Turn your scored paper so it's laying vertically along your score board.
Score at 1", 1.75", and roughly 7.5"


Turn your paper over and lay it horizontally again. Accordion fold your paper at 2.25", 3", 3.75"


Accordion fold the other side at 7.5", 8.25", and 9" where you scored your paper


Unfold your accordion folds and fold over the top edge of the paper where you scored at 7.5"


Then refold your accordion folds with the top edge still folder over.
Tape one side of the seam.


Press down to make the adhesive stick. 


Now leave you bag laying like this, we're going to make the bottom of the bag now.


Fold  up at the 1.75" score mark


Square out the edges by pressing the top flat, making the triangles in each corner equal (so they're pulled out entirely and the bag will stand up okay), and fold the sides up.


Then fold those squared out sides down.
This should happen to the bottom of your bag.


All you need to do to finish the shape of your bag is fold then top part down at the 1" score and then fold the bottom part up at its 1" score. Tape to keep in place.


Punch two holes in the top of your bag being careful not to punch through the accordion fold on the sides.


Cut a piece of curling ribbon about 17" long. It had to be long enough that when you loop it through and tie it you can move it aside to fit items into the bag.


This should be your finished product.


Thank you for stopping by. I hope you enjoyed this project.


Friday, February 15, 2013

Watch Me Grow

Here is the other sample page that I made this weekend for the store. You can find it hanging in the My Minds Eye paper section of the store.


Everything you need to make this page can be found at Picture This:

MME Everyday Fun " Good Measure"
MME Indie Chic" Citron Grow Title"
MME "Best Buddies Transparency"
My Favorite Things/Dienamics "Sheltering Tree & Leaf Trio" & "Teardrop Tree"
Martha Stewart "Pine Needles" Edge Punch

Thanks for stopping by!

Wednesday, February 13, 2013

What a Wonderful Day

This weekend I got some crafting in, specifically scrapbook pages for samples for the store.
Here's one of the samples using My Minds Eye paper:


All of the supplies needed to make this page can be found at Picture This:

Martha Stewart Daisy Fan Deep Edge Punch
MME Indie Chic "Ginger Travel Tulips"
MME Breaking Free "You & Me Frame"
MME Indie Chic "What a Day Journal Card" & "What a Day Title"
Zva Bling
Kaiser Paper Flowers- Sky Blue
Dark Desert Dune CS


Monday, February 11, 2013

Orchard Tree Frame

This card is super simple, and showcases how easy it is to use Memory Box frame die cuts. The die does everything for your card you don't have to add any embellishments to it. It's beautiful on its own.


Supplies:
Memory Box Die 'Orchard Tree Frame'
McRice Medley (trees in background)
Eggplant CS, Lavender CS, Cream CS


Thursday, February 7, 2013

PEEPS

Usually I am the one behind on their Easter cards, especially here on the blog, but I made one already and it's not even Valentine's Day! I was inspired to make this card using this paper because I was trying to organize my paper. Somehow my box for projects I'm currently doing just got all of my new paper thrown in on top of it rather than in their coordinating boxes (holiday, distressed, solids, girl, boy). Well I found this at the very bottom of my projects pile rather than in my holiday bin; I bought it with the intention of snapping a picture of my Easter basket full of PEEPS from Easter last year. Well I never got that picture (or very many other pictures last Easter) so I put this sheet of Sugartree to work on a card. And it's adorable. =)


The ingredients you need to make PEEPS are:

SUGAR


That is Sugartree paper. "Suzanne" #Su55
Shimmery yellow ribbon and green plaid ribbon
Alphabet stamps and a stamp that says "Celebrate"
I used two different alphabet stamp sets to make "EASTER" and "with your peeps".
The Celebrate stamp is by Studio G


Thanks for stopping by! 
Now go find yourself a box of peeps (and then share some with me-YELLOW please!)

Tuesday, February 5, 2013

What's the Buzzz?

So eons ago I colored this image with my Copic markers and I was going through my projects and found the image. I have about 5 of them total stamped out (with the saying as well) in on of my project boxes. Obviously this was another one of those projects that I started and intended to finish but hadn't gotten around to it yet. It's been months, probably closer to a year, since I've had this image in my bin waiting to make use of itself. 

Well! It's got use now. At least one of the 5 images does...I'll have to get around to coloring the other ones and then turning them into something spectacular. 


If you'd like to make the Beehive card this is what you'll need:

Copic Markers (Y35, B39, C00, C2, YG63, E00, E23)
Spellbinders Nested Lacey Pennants & Labels 18
Martha Stewart "Daisy" Punch
MME PB&J "Sunny Day"
Paper Flowers

I apologize for the fact that I don't know what the stamps are from. They do go together, they're from the same company and came out at the same time. I want to say Great Impressions but I won't commit to that.

Thanks for stopping by! I hope you've been inspired! 

Sunday, February 3, 2013

Danish Heart Baskets

This year for Valentine's Day I am making Danish Heart Baskets (typically made for Jul (or Christmas) in Denmark). Last night at work I found myself utterly bored out of my mind with my co-workers and decided to start making a heart basket. None of them had ever seen it before, and I always thought everyone knew how to make them. They're very simple once you get it down but it can take a few times before you get it right. At least that's what I learned from teaching one of my co-workers who wanted to learn how to make them last night. But after a couple of tries he was able to make them on his own and they looked better than mine! 


My grandma was born in Denmark but moved to the U.S. when she was still a baby. Her parents carried on many Danish traditions and over the years she has shared some with me. I can remember making these baskets with her when I was young, probably five or six, and we always make then in red and white glossy paper. The flag of Denmark is red and white so that's where the tradition came from. But I've seen other colors used, typically red is one of them though. 

MAKING THE BASKETS:

The first row is the easiest to weave, with the last being the hardest. This has to do with the fact that you have so much more room for your rows to move around in the beginning but as you near the end you have virtually no wiggle room. There are a few different ways to make the hearts to get differing patterns but I will show you the more basic of the designs. Using three rows is the easiest to begin with, I believe that is what I was initially taught with. Then you can add four or five rows. They get more time consuming and harder to weave as you increase the row amount. I will show you a four row Danish Heart Basket using red and white construction paper.


Start with two long ovals folded in half and cut 3 strips into each one starting at the fold and going towards to rounding top. Make sure your cuts are AT LEAST as long as your oval is wide (otherwise you won't be able to weave all of your rows and make them fit). 

*Remember your ovals are folded in half and cut, so there are TWO layers to them when they're folded. This is how you are able to weave the strips IN and OVER of each other to make a basket that will open up at the end. Be sure to weave IN and OVER, not just over and under.*


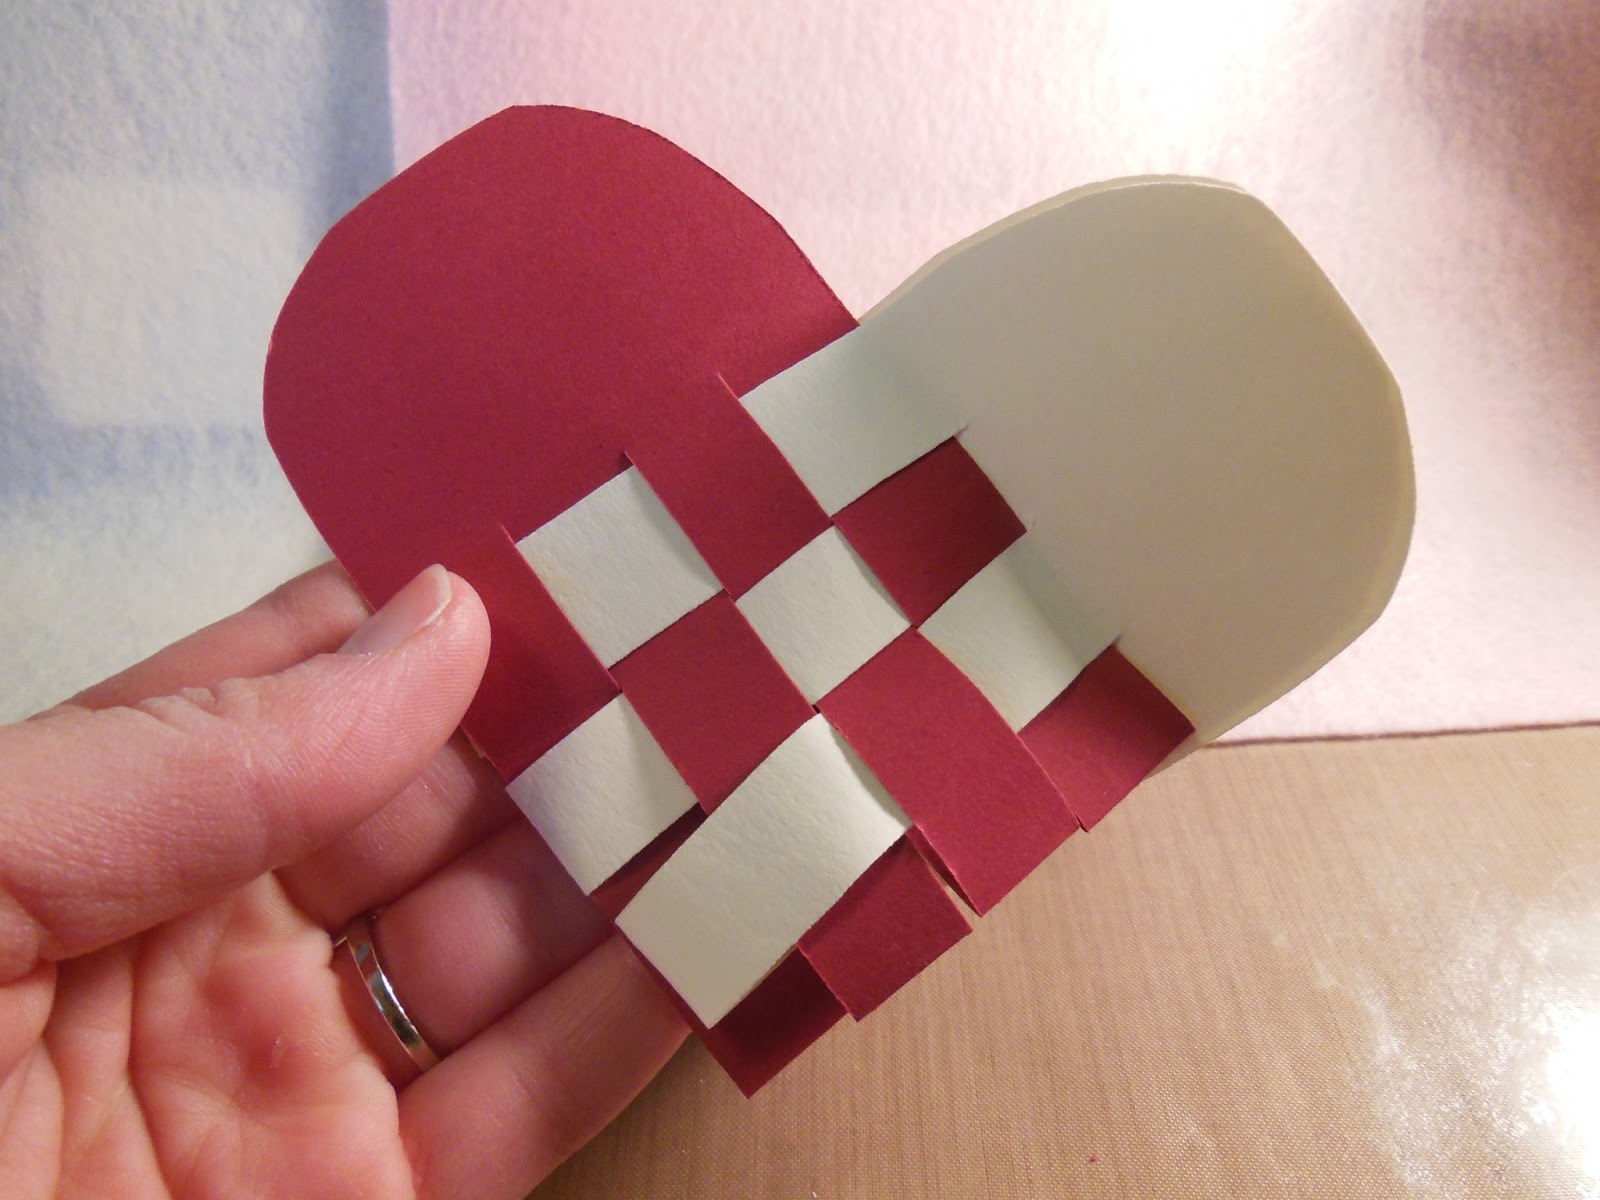
Take your white oval and open up the first strip and put it OVER the(1st)  red strip (red is INSIDE the white).


Take the same white strip and thread it IN BETWEEN the (2nd) red strip.


Take the same white strip and put it OVER the (3rd) red strip (red INSIDE white).


To finish your first row, thread your white strip IN BETWEEN the last (4th) red strip. 

Then scoot the entire first row up to make room for your next row.


Take your 2nd strip of white...


Thread it INSIDE the (1st) red strip (white INSIDE red)


Take the same (2nd) white strip and put it OVER the (2nd) red strip (red IN BETWEEN white)


Take the same white strip and thread it IN BETWEEN the (3rd) red strip (white INSIDE red)


To finish the second row, put the white strip OVER the red (red INSIDE of white)


This is what it will look like after the 2nd row is complete


For the 3rd row, take the 3rd white strip and put it OVER the 1st red strip ( so that red is IN BETWEEN white)


Take the same 3rd white strip, and thread it through the 2nd red strip (so white is IN BETWEEN red).

Then continue the pattern weaving in and out to finish the 3rd row. 

3rd white over red (so red is in between white)
3rd white in between red (so white is in between red)

Now to start the last (4th) row:


Thread the last (4th) white strip through the 1st red strip (white IN BETWEEN red)

And then continue the pattern:
White strip over 2nd red
White strip through 3rd red
White strip over 4th red


(This is right before you thread the last white strip over the 4th red strip) 


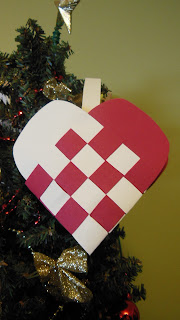
This is your final product!


You should be able to open it up and fit some goodies inside now!

You can add a thin strip from the middle of each side of the Heart Basket with adhesive so that it can hang.

Hope this tutorial is easy enough to understand. Happy Crafting, and Happy Valentine's Day!