Friday, March 29, 2013

Wine Bottle Tags 2


So do you remember when I posted my wine bottle tags a few weeks ago ? Well here is the finished product for display!! I'm so excited I think I'll be saving every glass container I empty and  will be wrapping hemp/twine around it! Love the look and it's pretty cheap (especially if you're drinking cheap wine like I do). 


So I went to town with the spray adhesive ( <= my new best friend! Between these wine bottles and those binders I'm sure I will be needing a new can very soon.) 
Anyway, back to the point. I went to town with the spray adhesive spraying about 3" of my bottle as I went. Spray, wrap twine tightly until you get to the end of your adhesive spray/or if it begins to loose tackiness. Per the directions you're supposed to apply within 15 seconds to have a permanent bond but I can't wrap that much twine that fast. I felt that like a minute and a half gives you enough time to wrap a 3" section with the adhesive remaining tacky. 
Now, keep spraying and wrapping from top to bottom (as I did) or until you like the look of your bottle. 
Your fingers may get a little sticky doing this project. Make sure that when you're spraying your adhesive you protect the surrounding area!!! Not with a craft mat either. I use a shoe box. This adhesive does not wipe off. At least not without a TON of effort, soap, Clorox wipes, and warm water (and REPEAT several times). Almost ruined a brand new craft mat the first time I used this stuff, because like you're supposed to be able to just wipe adhesive off of the may rightttttttt? I guess spray adhesive is not included in that.

But I ramble!! 
Just scroll down and look at the pretty finished product!!


I think that I'll be reusing these for my wedding reception as the flower in that "vase" is one for the reception decorations. Yay! A double reuse of an item. I feel so eco-friendly!

Thanks for stopping by!

Thursday, March 28, 2013

Journal Book

Here's another item I recently made for the craft fair from the many binders I saved from the garbage a couple of weeks ago.
Front and back cover:
Jillibean Soup- Watermelon Gazpacho Soup-Seedless Cucumber
MME Ooh La La "Over the Top"
The inside is full of patterned paper from a variety of companies including MME, Authentique, my little shoebox, and IOD. They all have a notebook paper pattern that I thought looked very cool for a journal or day planner.
Thanks for stopping by! Have a great day!!

Sunday, March 24, 2013

Beach Mini Album 2

Okay, I know the picture is sideways but I took it on my phone so I can't fix it. This is the cover for my beach mini album.

Saturday, March 23, 2013

Beach Mini Album

Today I'm sharing a new mini scrapbook I made today. This is another item that will be for sale at the craft sale coming up that my mom and I will be featured inside. Remember PT is having it's craft sale on April 6th. Make sure to stop by!
The background paper is Kaisercraft "Horizon"
G45 On The Boardwalk paper for the girls
Spellbinders Standard Lg Circles
Memory Box wave border and simple banner
Martha Stewart Sanddollar and Starfish punch
Gold pearls
Yellow The Twinery twine
Kaiser Craft ABC bubble stickers

Friday, March 15, 2013

French country recipe book collection

Yesterday at work we were getting rid of some cute little 3 ring binders and I thought they'd be perfect for some projects so I saved them from the trash! Now I have ten to play with. Today I made a recipe book out of one for all of those pinterest printed recipes I have. Now they have a single location

Monday, March 11, 2013

Wine Bottles Signs

For the craft fair that my mom is in in April, she wanted me to make some signs for her. Here's what I came up with for what she wanted them to say. I think they turned out pretty cute myself. All I need to finish them it to wrap twine around the bottles (and polish off two more wine bottles!).


Variety of ABC stamps
Judith Flower Stamp E-68
"Gift" and "Flower" stamp I purchased from the Annual PT Thrift Sale (which is coming up soon! April 27th)
Spellbinders Lg Scalloped Circles & Labels 20
Copic Markers (to color in the flowers)
Ribbon (attached to the back of each sign to tie around the bottle

Sunday, March 10, 2013

Triscuits rock!!

So last night I  had to go grocery shopping because according to the weather it was supposed to snow 3-6", then sleet, then rain. In other words not a fun day for running errands. Also, I am making dinner for Shane tonight for our "date night" and I needed some supplies. I scored some chicken in the "Special" bin for CHEAP. Score! Just what I needed for tonight too. 


Anyway...back to the Triscuits. I needed crackers of some sort according to my grocery list since they had all been eaten up (between my Tastefully Simple party a couple of weeks ago and eating LOTS of dip that I received from said party). You know, cuz you always need crackers to go with your dip. Well, I wasn't feeling Wheat Thins like normal, and I think Triscuits go better with dips because they don't have as much flavor. But I saw these babies! Besides being "Roasted Sweet Onion" which sounds amazing, they're made with brown rise and sweet potato. I had to try them just because of what they're made out of, right????

WELL, it was definitely worth getting them. They're amazing. :) Even on their own. (And I never eat crackers sans dip/cheese/topping of some sort).

Thanks for sticking with me this far. I apologize that my rant about Triscuits is all you stopped by for. Please continue to visit me! 


Saturday, March 9, 2013

Cupcake Flags


So Monday was Shane's birthday, and in preparation for his birthday, I made some cute decorations for the cupcakes I was planning on making him. Here is what the process of making these cute little cupcake flags looked like:


First, I cut out the banners using white cardstock and Spellbinders "Nested Lacey Pennants".
Then I stamped what I wanted each flag to say onto the cut out banners. I chose "Happy Birthday" and "22" . I used different colors too so that my end product (the cupcakes) would each be unique. 


Then I gathered some toothpicks and tape and got to work. To make these cupcakes flags I simply cut a piece of tape a half inch longer than the banner and placed it over the banner. I used the extra half inch to wrap around the toothpick and then cut off the tape in between the "<" on the banner. Sometimes the tape came unrolled from the toothpick, so I put an extra little piece from the toothpick to the banner after it was rolled on.


The (almost) finished products. All we need is cupcakes!

I will be posting some pictures of the finished cupcakes soon.
Have a great day!

Monday, March 4, 2013

Happy Birthday Shane

Today is my wonderful fiance Shane's birthday. I'm off of work today so all day I have been baking and cooking, running errands and decorating so that when he comes home from work tonight I can WOW him right when he walks in the door. He's got a surprise in store for him. I will post pics of my misdeeds! Muahhaha!

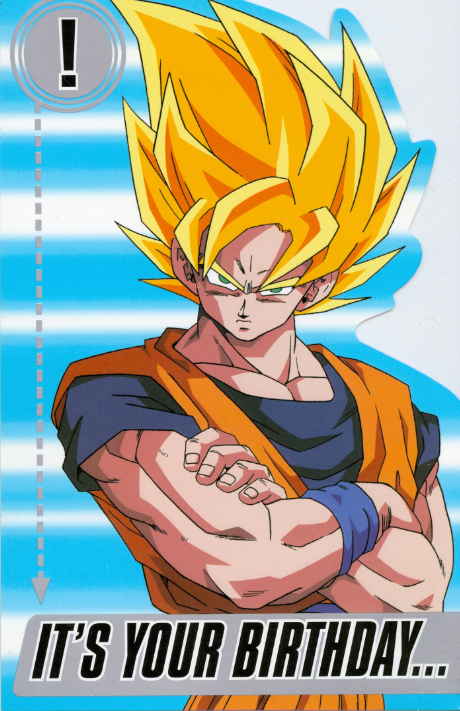
And this picture is for Shane- he loves Dragonball Z. 

HAPPY BIRTHDAY!


There is also a craft project thrown into the pictures that I will be posting so be sure to look when I update the blog!

And maybe I'll throw in a picture of the things I've been baking and cooking as well.

Thanks for stopping by, have a great day!

Sunday, March 3, 2013

Thinking of You in Blue

Yay for easy cards! These cards were all made with one sheet of paper, and I think that I ended up using ii all up with these 6 cards. They're another addition to my collection of things I'm giving to my mom for the craft fair she'll be in in April. 


Paper: October Afternoon Hometown: "Depot Park"
Spellbinders Standard Lg Circles & Lg Scalloped Circles
Just Rite "Just a Note" 1 5/8" Stamp Set
Cuttlebug Swiss Dots Embossing Folder

Have a great day!