Thursday, January 17, 2013

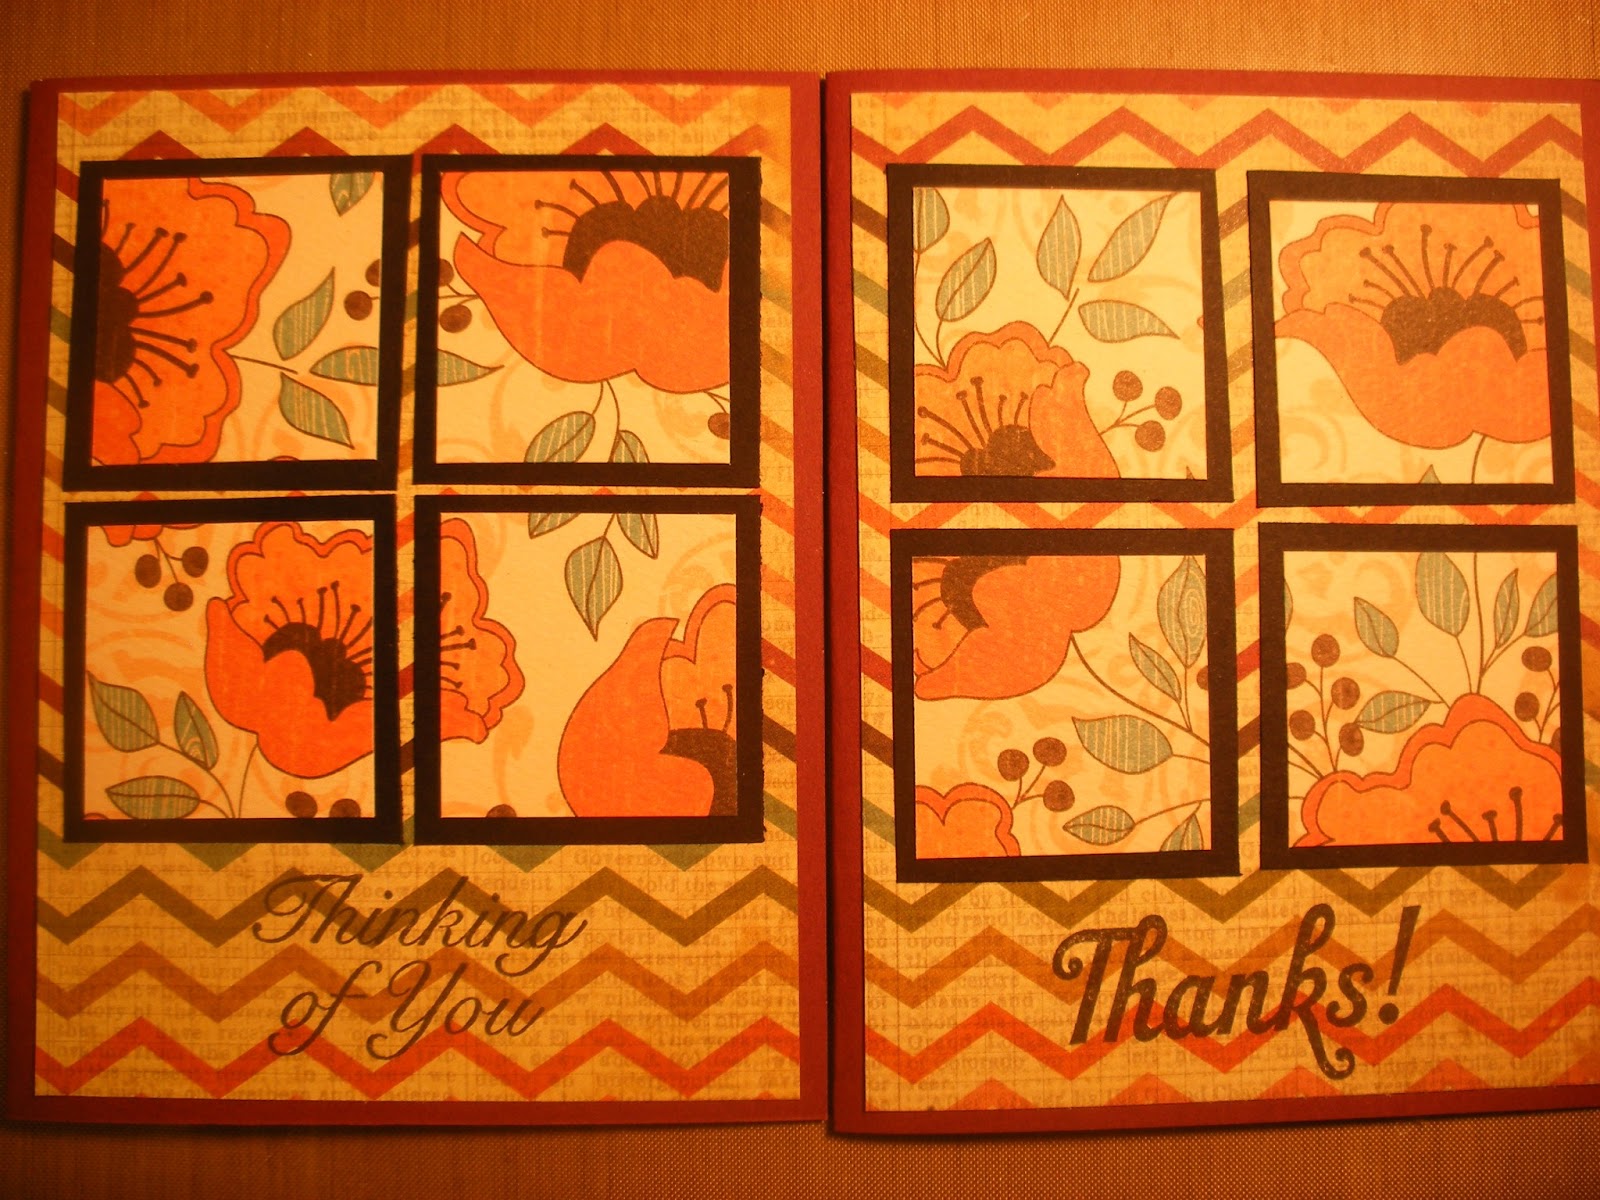
Poppy Windows

I love any paper that has poppies on it. I'm not drawn to just any paper with flowers on it, I just love the poppies. I think it's the color of them. They're like a coral color. They can be orange-y or pink-y. Or a mixture of either. I love that mixture of colors. Therefore, I love poppies. :) 


The poppy paper is Authentique. I don't remember what the Zig-Zag paper is. I'm also not sure what the stamps are. I made these a while ago...but I still love them!! Graphic 45 also has a poppy paper from their Wizard of Oz paper line.

Enjoy!

Wednesday, January 16, 2013

When Pigs Fly


Have you seen the new Geico commercial with the pig on the airplane where the stewardess asks him to put his little word game away but he explains that he's using his Geico app and she doesn't believe that's true and she says "Ill believe that When Pigs Fly"???? I love that commercial. If you haven't seen it, you'll love it too.  I just saw it play and I'm sure that it will play again so don't worry if you haven't seen it, you'll get your chance.

I have decided that this card is in dedication of that commercial. 


Supplies Needed:
 (Ready for this? It's gonna be a huge list.)

Graphic 45 Olde Curiosity Shop 
&
A pair of scissors to cut out the peacock feather emblem

:)

Happy Crafting


Tuesday, January 15, 2013

Happy Haunting

So, I thought I'd throw a little Halloween into the mix today  because it doesn't get enough card attention. I mean I sent out Halloween cards but do most people? I'm not sure. But I like to because I entirely enjoy making Halloween cards; they can be creepy but still cute. And they're fun to mail, especially if you have some young ones to send them to because you can stick some candy inside of them. What else would someone expect for Halloween?

All I've been seeing lately on TV are these previews for the new scary movie Mama. It looks REALLY scary. I can't wait to go see it. Or better yet to own it and watch it in my basement to make the scary effect that a scary movie has even scarier. Right? Well anyway there's at least one commercial on for this movie every commercial break on some channels, so it's really pumping me up to see it. It makes me want Halloween to be coming soon. But since Halloween is NOT around the corner, I will have to settle for some cards that feature the creepy house from around the corner (or the end of the block).

The first picture here is to show you the details of these cards up close. 


This picture is to show you some of the slightly altered designs of this card that I made. I had to alter the designs not just because it's fun to do, but because I made the first card using some scraps and had to finish the rest of the cards using the rest of the scraps or by finding more scraps to use instead.


Supplies you'll need to fill your Halloween bucket:
Carta Bella-All Hallow's Eve "Scary Stripe" paper
My Mind's Eye-The Spider's Web "Cauldron Bubbles" paper
We R Memory Keepers-Urban Window Collection "Restortaion Jacquard" paper 
Great Impressions c405 "Have a Frightfully Fun Halloween" stamp
Black and White The Twinery twine
Spellbinders Lg Classic Inverted Scalloped Circles
Spellbinders Labels One
Spellbinders Ribbon Tag Trio 3 
Memory Box Country House


Betcha didn't think that the Country House (Memory Box) could also double as a haunted house did you? Did you see it as a church either? Ah...well now your eyes have been opened.

Happy Hauntings!

A Happy Hello


I love these kinds of cards. They're almost impossible to mail (they end up really thick) or way too expensive  to mail (they're really thick AND square cards are more expensive to mail)  but they're so much fun to make and hand deliver to someone. I posted one a LONG time ago that I  made for my older brother's birthday; that one had all sorts of moving parts and such and I could tell it was tons of fun to receive, but this one is much simpler than that.


Ingredients needed to make a Tri-fold card  like this one:
Ribbed 8x11" black cardstock (cut to 6x11" plus a 2x4" strip)
Graphic 45 (I think that Fashionista line but not sure)
Tim Holtz/Sizzix Dress Form Die
Spellbinders Fancy Tags
Tim Holtz Blue Paint Dabber (for the spool, dress form, and to distress the edges of the Fossil cardstock)
Chipboard (for the spool and dress form)
A pretty flower embellishment
More pretty charms (find in jewelry section or brad section of craft stores)
Lace Ribbon
Fossil Cardstock

ENJOY!

Monday, January 14, 2013

Way Back When. . .Card Kit

Whoa, is this a blast from the past. I found these cards in my stash and realized that I never posted them on my blog. So way back when, when I was still working many hours at Picture This and had time to do things like this, I made a card kit. This is said card kit. Sadly if you like it we no longer have it. Also sadly, I have absolutely NO idea what any of these papers are...I do know that they were doubled sided and at least one of them was the kind of paper that had 4 6x6 squares on its back side that showcased some of the other papers in its paper line. I can tell you that it's old and sold (out) because that is why card kits get made: to sell things out. The embellishments are My Minds Eye. The ribbon PT still carries: green mesh ribbon. Also the blue embossed paper is Core-dinations. The Cuttlebug embossing folder is called Moroccan Screen. The white tags are Spellbinders Ribbon Tag Trio. And the stamps are/were all from Leann's stash.


But don't fret over the fact that these cards are old and there's no way you can still get anything used to make them, because you still have the idea. ;)

Sunday, January 13, 2013

Bricks and Windows


I'm back as I promised to be. This time I have a card for you, rather than a project. You've probably got the  supplies for this already, they're kind of the staples of cardmaking. If you don't however, you'll be wanting to down to Picture This and picking them up because once you use them, you're gonna be hooked.


To make this card you'll need:
Memory Box Small Madison Window
Spellbinders Ribbon Tag Trio 3
Tim Holtz/Sizzix Brick embossing folder
Judith F-262 'Merry Christmas' Stamp
Graphic 45 Christmas paper
Tim Holtz Fired Brick Distressed Ink
Plaid Green Ribbon

See? You've probably got all of these. And if you don't, of course you can change out the Judith Christmas stamp for any other one you have on hand, same with the label, and you can use any kind of red ink you may have. BUT I think you really do need the Tim Holtz Brick folder and the Memory Box Window die. Really, you need them. Go get them if you don't have them. Every project from now on you will want to use these things, or you'll be making a project and think "Gee, If I only had XXX then my project would be perfect and it could be completed". Seriously. And of course if you'd like to make this card you will also need them because as far as I know, no other companies have a brick wall embossing folder or window as versatile as this one (although Cheery Lynn does have a bunch of cute windows that have a bit of flare, like stained glass church windows).

Happy Crafting!

Saturday, January 12, 2013

Peppermint Candy Christmas Ornaments


So I have been slacking for a VERY LONG time.
I haven't been on the blog.
I haven't even had time to create or buy anything to create with.
I don't know where all of my time has gone, but now I am making some time to update my blog at least. 
Many of the posts to come will be items from the Goodwill: old for me but new for you. 
It doesn't mean you can't still love the ideas and use them which is why I am posting them for you. 


So, the first order of business are these fun Christmas ornaments. Like I said, these are old, BUT it's never too early to be thinking about Christmas for NEXT year. These ornaments are super easy to make and there are so many different designs that you can make them with so that each one is unique. I made two different bodies for my Peppermint Ornaments. One is the typical wrapped peppermint silhouette (1) and the other is a larger circle (2) that resembles an UNwrapped peppermint. 

(1)

 (2)


Okay, so to make these ornaments you're going to need a few things:

Tim Holtz Mini Rosettes Die
Patterned Paper (I used a Red, White, and Green Christmas paper with diagonal stripes)
Ornament Hooks
Tiny Hole Punch
Glitter (I used White Martha Stewart)
Spray Adhesive or Modge Podge

Directions:
  1. Cut your paper into about 3"x12" Strips
  2. Cut out your die from this paper strip
  3. Fold the die and make your rosette (Use the big rosette for (2) and the small one for (1)). Do not put the extra circle it punches out onto the front of your ornament, only the back. You'll need to cut an extra small rosette for the ends of (1). To make (1) cut the extra small rosette at about 8 perforations (x2) and adhere them on opposite sides of the rosette you've assembled pinching in the end that you're adhering so that the other ends flares out.)
  4. Once your ornaments are assembled brush Modge Podge onto the surface of your ornament (the pretty side/front) using a big frayed paint brush or spray adhesive on the surface of your ornament (remember to protect the surrounding area from overspray). Then sprinkle on the glitter (or pour it on) until you've reached the desired sparkleness for your ornament.
  5. Lastly you're going to punch a (tiny) hole in the top of your ornament and insert the ornament hook. For (1) I punched the hole off center to give the ornament a more appealing look when it's hanging.
VIOLA!! A Beautimous homemade ornament!

Stay tuned for more posts coming from me very soon. 
I will be trying to update my blog much more frequently! 
Have a lovely day! 


Friday, September 28, 2012

Candy Sign

CANDY ANYONE?


I have had these popsicle stick fence pieces in the drawer in my crafting desk for at least four years from when my younger brother and I used to craft together. All we ever finished from the project was hot glueing the popsicle sticks together to make fence pieces. We also made a gate out of one of them (the C) by putting a drawer handle on it to look like a door handle and then glueing a popsicle stick diagonally onto the piece.
 
Anyway, I nailed them all together and cut out some pennants and made a Halloween sign out of them! :)
 
Materials:
 
Hot Glue
Popsicle Sticks
Spellbinders "Lacey Pennants" and "Inverted Scalloped Circles"
Graphis 45 Happy Halloween Collection "Pumpkin Time"
Reminisce Trick or Treat  "Spider's Trap"
MME The Spider's Web "Cauldron Bubbles"
C10 Copic

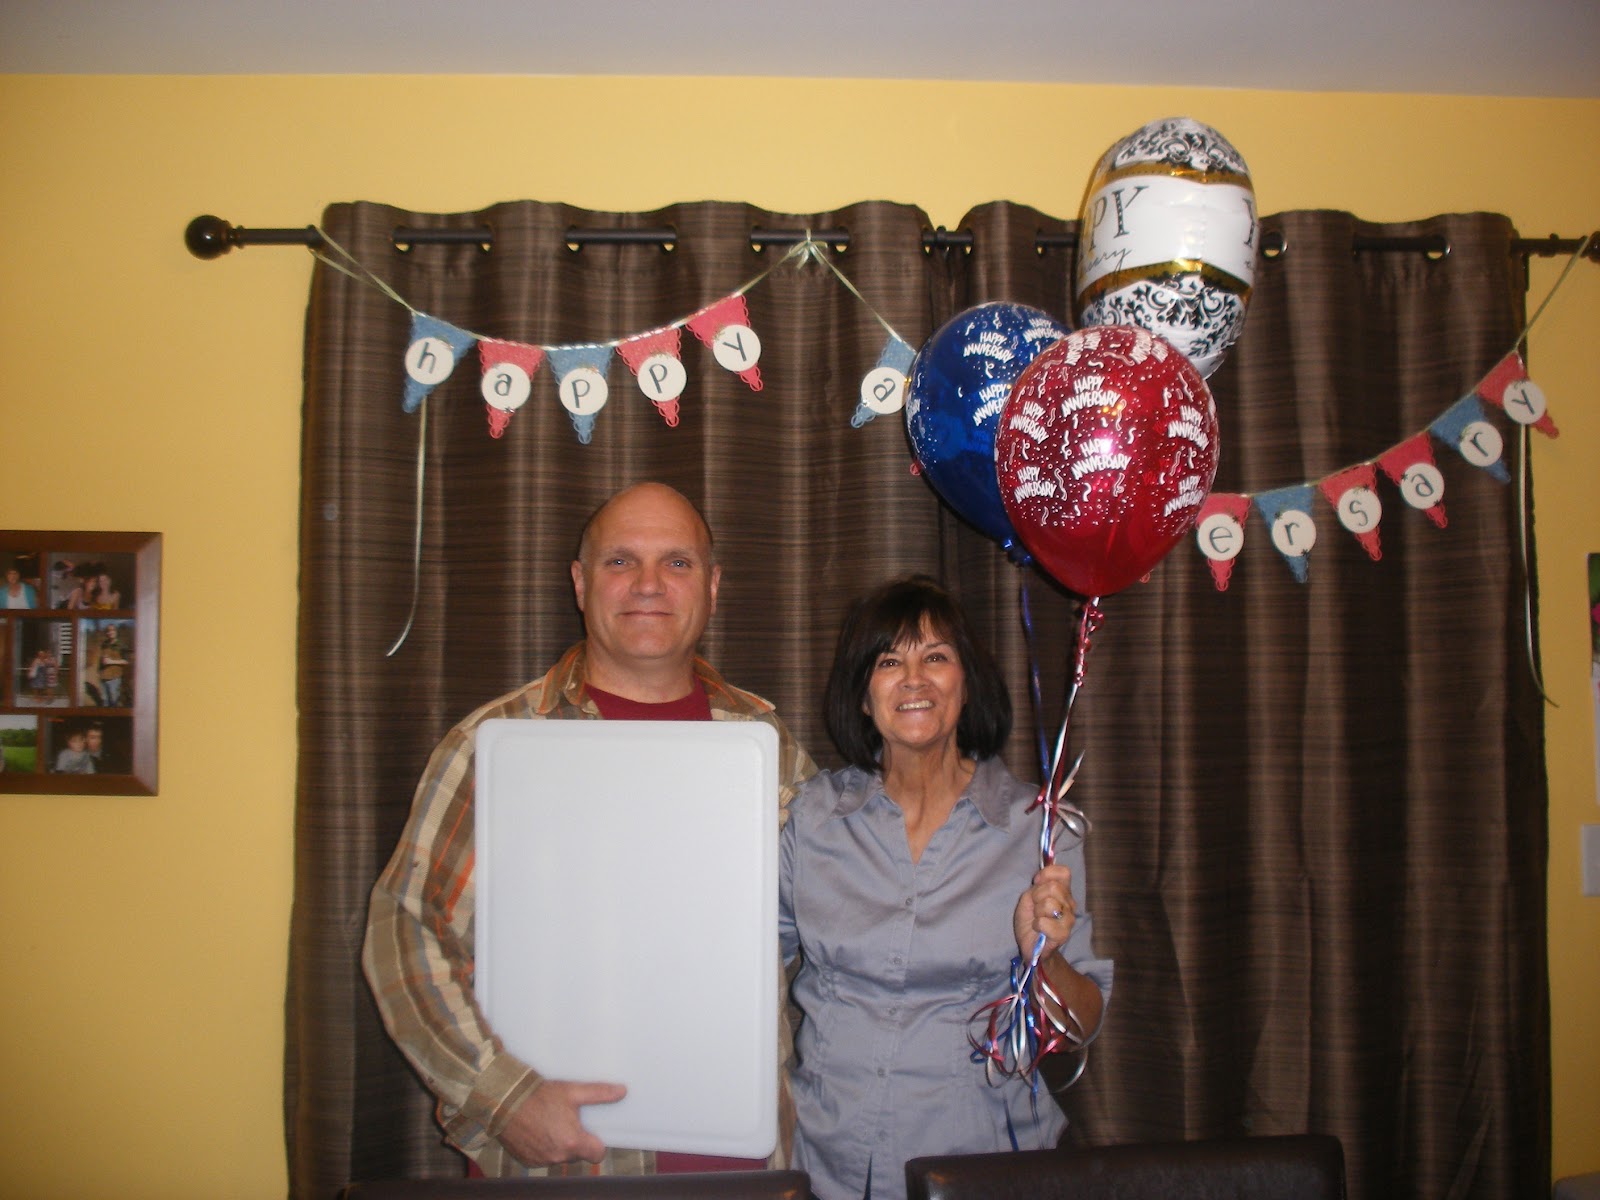
Happy Anniversary

 
Happy Anniversary!
 
It took me two and a half hours to make this banner, but it was worth it to see the joy it brought to the faces of my soon to be in-laws.


The celebrating couple.
 
 
The set-up.


The banner.

 
The details.
 
 
Materials:
  1. Paper- Echo Park Paper For the Record line, "Lazy Daisy" and "Diamonds". Crate Paper- Paper Heart Collection, "Delicate". Silver Mirrorcard. Cream Luster. Light Olive Green.
  2. Dies- Spellbinders "Lacey Pennants" and "Standard Large Circles". Martha Stewart "Branch" punch. EK Success"Daisy" punch.
  3. Green Ribbon.
  4. Copic Marker-C10 (lettering).


Thursday, September 27, 2012

Have a Frightful Halloween

I haven't posted in months! I feel likeI never have any time to create, but I have been buying and getting ideas like crazy. So there is a lot of new stuff that I have yet to play with but hopefully soon there will be some inspiration flowing from my blog yet again.

My biggest set back with creating is that I need some reason to create, and now that the holiday season is approaching, I have inspiration again!
 
Here's a card that I just whipped up with lots of new product from the store.


Martha Stewart Graveyard Edge Punch
Memory Box Dancing Skeletons die
Penny Black "Slapstick" Cling Stamps
Cuttlebug Tag Die