Showing posts with label Christmas. Show all posts

Thursday, January 23, 2014

Mirry Christmas

Cheery Lynn Designs "Christmas Card FRM416", green mirricard, red cardstock

Wednesday, December 25, 2013

Merry Christmas

Merry Christmas. Happy Holidays.
I hope everyone is enjoying time with their families this holiday season. I am lucky enough to be able to spend it with two families, both days. But be sure to take time to think about the less fortunate this season. Last week my co-workers and I baked Christmas cookies and plated them for the Ruth House, a local shelter for a displaced women and children. They were very appreciative and impressed with the gesture. We ended up donating seven platters of cookies, about nine dozen. :) It was a great feeling knowing that a simple gesture like that could make someone's holiday season better. And we thought it was especially uplifting for these families with children who were displaced this Christmas.
I hope everyone has a great Christmas!!
Thanks for stopping by :)

Sunday, December 22, 2013

Santa Belt Place Cards

Looking for a little something to spruce up your Christmas table? I figured out what I needed. Place cards! I originally was going to use berry picks in some way but I wasn't getting inspired by them. But then I came up with this cute idea. Santa's belt! Now, I know that the colors do not coordinate in this picture, but it's the idea that I'm going for here. I plan on buying red felt ribbon and red and green napkins tomorrow so that the place settings actually look like Christmas.

Here's what I used to make them:
Spellbinders Ribbon Tag Trio 2
Black cs
Gold metallic ink + gold Sharpie
Ribbon with wire in the edging (to wrap around the sides of the plates-using less ribbon)
Your favorite holiday dinnerware and coordinating napkins

Have a great Christmas everyone. I hope this post gives you some ideas!

Saturday, October 5, 2013

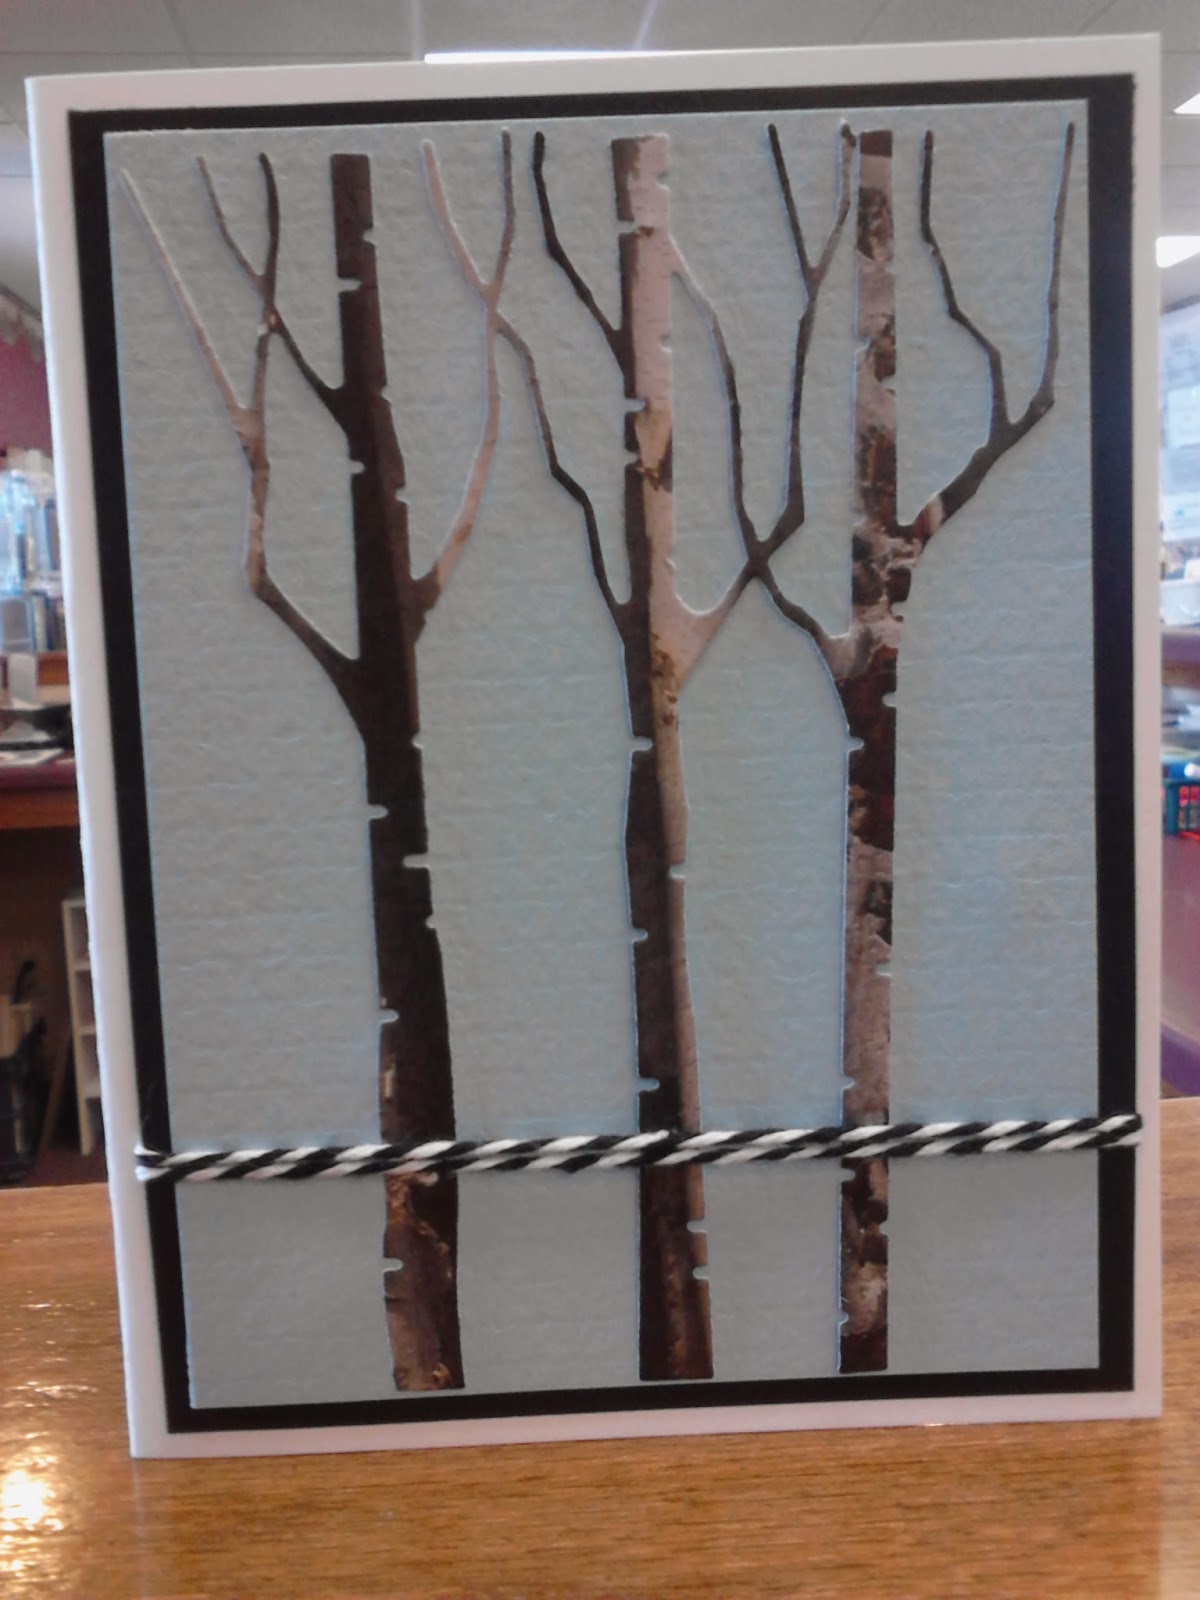
Birch Trio

This is one of my favorite dies of the season from Memory Box: Birch Trio. I love it cut out of Papers Best product #bb01 ( realistic birch tree paper) and paired with Pacific Blue cardstock. I added a little black twine from The Twinery and it finished the look. A vertical stamp on tge right would look nice if you wanted a more complete look but I was unable to find any in my stash or at the store that suited the card to my liking.
Cookie Cutter Tree Card

I used a diecut from a multipack of shapes from American Crafts "Holibery" for the tree, Christmas themed Washi Tape, twine, and Echo Park Paper "Vintage Santa".

The Bright Church

This card is an elegant one fitted for those on your Christmas mailing list that have religious views as well those that don't.
I used Cuttlebug's "kassie o's brocade" embossing folder, Memory Box's "country house", Spellbinders Standard Large Ovals, and gold twine.

Starry Night Sleigh Ride

This card was challenging because the sleigh die I used was hard to find something that went well with it and didn't clash or not make sense in the background. I bought the die last year but this was the first time that I had even used it!
Supplies:
Cheery Lynn Christmas Sleigh b140
Reminisce "out of this world" space buddies 12x12 paper
Memory Box Country Landscape

Magnificent Pine with Poinsettias

I LOVE this paper and this die. The turquoise color for Christmas is amazing and this tree is so beautiful. There are four components to this card: Memory Box Magnificent Pine die cut out of pine green cs, MME Mistletoe Magic "mistletoe" paper, EK Success "jewel" edge punch on white cs, and your choice of liquid pearls and stickles (I used white opal, platinum, and xmas red)

Matchbox Giftbox

This project is one that I worked on for the store for the Christmas Extravaganza, the idea was from Leann. I used  Memory Box's new Matchbox die which cuts out two pieces: the box form that you fold for the structure and the decorative outer part that you fild around the box. It was a little hard to figure out at first but once you realize how to put it together its easy. The flower is cut out from a Cheery Lynn Poinsettia die. White grossgrain ribbon was added around the box. The paper I don't remember what it is, but there's a lot of it at the store yet (sorry I didn't save the strip at the bottom for this ), however the second picture is of both sides if that paper if you're interested.

Birds of Sky and Earth

This is an extraordinarily easy card to make. I made six from one sheet of 12x12 imaginisce 400041. Its not as cost effective as the glittery snowmen cards from a few posts ago, but it does make for a very pretty card. I also used ice silver metallic cardstock and textweight for the card base and the bird. The die for the bird is Cheery Lynn "birds of heaven and earth". The tree I cut out of green mirracard using Memory Box "flowering Christmas tree".

Tuesday, October 1, 2013

Wreath

This is a super simple card to make. All I used was the Martha Stewart Branch punch (you could also use Cheery Lynns die that has multiple branches) and some pine green paper, memory box's sitring bird die, and some red stickles. Assemble!

Sunday, September 22, 2013

Red and Green Tree

This is a super easy card to make. I used my Spellbinders Nested Pine Trees to make this. I just cut it out of the center of green cardstock, stuck it on red cardstock, and stuck that on a white base. The stamp is an old Amuse stamp that's no longer produced but I believe Memory Box makes similiar stamps.

Sunday, September 8, 2013

Holy Cheap Christmas Cards

So yesterday I decided to buy this adorable glitter snowman paper because it was the last sheet and I figured it'd make for some easy cards. Boy was I right!! I got 6 cards out of this and they only ended up costing 38 cents per card. And two simple steps to make. I think this will be the way to go for future mass quantity Christmas card making. :)

White Luster CS
Best Creation "Just for You" #CW004
Impression Obsession cling stamp C5520

Thanks for sticking with me through so much Christmas cardmaking!! Its my favorite type of card to make.  I have lots of ideas for fall brewing in my head though, so as soon as I get to making them I'll be sure to post them. Plus, next to Christmas, Halloween is my favorite theme for cardmaking!!

Thanks again for stopping by.
Have a fantastic day!

Tuesday, September 3, 2013

Christmas Tree Lights

Here is one of the few Christmas cards that I made for our Extravaganza at the store that I CAN share with you today. I forgot that the tree die that I used was discontinued because Spellbinders comes out with a new Special Edition Christmas Tree die for each year. Stamp: Stampabilities "Merry Little Christmas 02 Paper: MME Winter Wonderland "at home" Dies: Spellbinders Nested Pine Trees and Ribbon Tag Trio 2

Sunday, January 13, 2013

Bricks and Windows


I'm back as I promised to be. This time I have a card for you, rather than a project. You've probably got the  supplies for this already, they're kind of the staples of cardmaking. If you don't however, you'll be wanting to down to Picture This and picking them up because once you use them, you're gonna be hooked.


To make this card you'll need:
Memory Box Small Madison Window
Spellbinders Ribbon Tag Trio 3
Tim Holtz/Sizzix Brick embossing folder
Judith F-262 'Merry Christmas' Stamp
Graphic 45 Christmas paper
Tim Holtz Fired Brick Distressed Ink
Plaid Green Ribbon

See? You've probably got all of these. And if you don't, of course you can change out the Judith Christmas stamp for any other one you have on hand, same with the label, and you can use any kind of red ink you may have. BUT I think you really do need the Tim Holtz Brick folder and the Memory Box Window die. Really, you need them. Go get them if you don't have them. Every project from now on you will want to use these things, or you'll be making a project and think "Gee, If I only had XXX then my project would be perfect and it could be completed". Seriously. And of course if you'd like to make this card you will also need them because as far as I know, no other companies have a brick wall embossing folder or window as versatile as this one (although Cheery Lynn does have a bunch of cute windows that have a bit of flare, like stained glass church windows).

Happy Crafting!

Saturday, January 12, 2013

Peppermint Candy Christmas Ornaments


So I have been slacking for a VERY LONG time.
I haven't been on the blog.
I haven't even had time to create or buy anything to create with.
I don't know where all of my time has gone, but now I am making some time to update my blog at least. 
Many of the posts to come will be items from the Goodwill: old for me but new for you. 
It doesn't mean you can't still love the ideas and use them which is why I am posting them for you. 


So, the first order of business are these fun Christmas ornaments. Like I said, these are old, BUT it's never too early to be thinking about Christmas for NEXT year. These ornaments are super easy to make and there are so many different designs that you can make them with so that each one is unique. I made two different bodies for my Peppermint Ornaments. One is the typical wrapped peppermint silhouette (1) and the other is a larger circle (2) that resembles an UNwrapped peppermint. 

(1)

 (2)


Okay, so to make these ornaments you're going to need a few things:

Tim Holtz Mini Rosettes Die
Patterned Paper (I used a Red, White, and Green Christmas paper with diagonal stripes)
Ornament Hooks
Tiny Hole Punch
Glitter (I used White Martha Stewart)
Spray Adhesive or Modge Podge

Directions:
  1. Cut your paper into about 3"x12" Strips
  2. Cut out your die from this paper strip
  3. Fold the die and make your rosette (Use the big rosette for (2) and the small one for (1)). Do not put the extra circle it punches out onto the front of your ornament, only the back. You'll need to cut an extra small rosette for the ends of (1). To make (1) cut the extra small rosette at about 8 perforations (x2) and adhere them on opposite sides of the rosette you've assembled pinching in the end that you're adhering so that the other ends flares out.)
  4. Once your ornaments are assembled brush Modge Podge onto the surface of your ornament (the pretty side/front) using a big frayed paint brush or spray adhesive on the surface of your ornament (remember to protect the surrounding area from overspray). Then sprinkle on the glitter (or pour it on) until you've reached the desired sparkleness for your ornament.
  5. Lastly you're going to punch a (tiny) hole in the top of your ornament and insert the ornament hook. For (1) I punched the hole off center to give the ornament a more appealing look when it's hanging.
VIOLA!! A Beautimous homemade ornament!

Stay tuned for more posts coming from me very soon. 
I will be trying to update my blog much more frequently! 
Have a lovely day! 


Saturday, April 28, 2012

Oh, Pinecones!


More from my old Christmas collection! 


The paper is Reminisce Holoday Bloom.


Tim Holtz/Sizzx Tattered Pinecone Bigz Die
Zva bling
Stampabilities Merry Little Christmas 02

Thursday, April 26, 2012

Have a Cool Yule

Here's another Christmas card that I made from my leftovers that I found in one of my project bags.
This is really similar to a card I did last year...I think. I made it for the Card Marathon I think...It's made from all the leftover pieces I had.


SB Ribbon Banners 
SB Standard Scalloped Circles
SB Standard Large Cirlces
Amuse stamps (have a cool yule & the boy and girl stamp)
Martha Stewart Deep Edge Punch (the pink swirly piece behind the people)
Crate Paper Snow Day Collection Sparkle (lightbulb paper)
Twinery lime green twine
Copics


Sunday, April 22, 2012

An Edward Christmas

This past weekend I really wanted to get some crafting done after work, but I hadn't bought anything new from the store so I dug around in some of the bags of paper and projects that I have laying around and made a bunch of cards, mostly with old Christmas paper. But it was still a ton of fun. I made a ton of cards and got rid of a lot of old paper that had only been used for one card.

Here's one card I made. 

The boy is Greeting Farm (Edward Cullen)
I think that the paper is a Christmas piece from MME, not sure on the polka dot
The snowflake is a Spellbinders snowflake from a variety pack 


Edward was colored with Copics:
E00 for his skin
E23 and E25 for his pants
YG63 for his shirt, layered on top of itself for texture
B39 and C10 for his hair
C10 for the black parts of his green shirt
(Also, I used C2 for his shirt underneath)


Tim Holtz Chipped Sapphire Distressed Ink 
Stampabilites Merry Little Christmas 02


Saturday, March 31, 2012

Mini Tree


Supplies:
Tim Holtz/Sizzix Mini Pine Tree & Holly
Mc Rice Medley
Sizzix Gridlock folder
Twinery Charcoal/Black Twine