Showing posts with label Valentines Day. Show all posts

Monday, February 17, 2014

Love Coupon Book


So last Thursday my practically sister-in-law sent me a text asking if she could come over because she needed help making a gift for my brother. We share a scrap room at my house so of course  I said yes even though the idea of helping make my brother a romantic gift is totally nauseating. Whatevs. It ended up being a fun afternoon and I got to experience how to use a Cricut, if only slightly, for the first time (I prefer our Pazzle at work thank you very much!).

Anyway, she has SOOO much paper it's ridiculous. So we had plenty of Valentine's day themed paper to work with.

 We ended up making a 16 page coupon book including the front and back cover, with 14 coupons on the inside, and 15 different Valentine's Day themed papers. There's 14 coupons because V-day is on the 14th of course. 
We cut cardstock to be 3x6", then each paper to be 3x6" (x32 of those). We attached a different patterned paper to each piece cardstock on the front and back, to give it some stability.

She cut out some letters on her Cricut for the front cover to say "love coupons".


Then we cut 14 pieces of cardstock to be 2.5x5" and that's for writing the coupons out. Hole punch all of the pages, and  fill your coupons out, and string some ribbon through it and you've got yourself a love coupon book!


Happy Belated Valentine's Day

P.S.
I made one of these for my husband last Christmas, but not fancy with patterned paper or anything, and because men don't understand some things, I added expiration dates and terms of use. The first page after the cover of mine was a disclaimer page stating that" all coupons expire within 6 months of" said date, "only one coupon per day", "coupons cannot be combined". But watch out because my husband was crafty and he would use some before midnight and then right after midnight to avoid that "one per day" rule. ;) Good luck if  you make one for your significant other.

Thursday, February 13, 2014

Dress Form Valentine

Join us today from 11-1 for Todays Make-n-Take. Designed by yours truly. Tim Holtz Dress Form dies are 40% off during the MNT.

Sizzix/Tim Holtz Sewing Room (dress form die)
Lawn Fawn Stitched Journaling Card die set (heart)
Spellbinders Curved Borders Two (for the edge)
Pebbles Washi Tape (pink and white polka dots)

Sunday, February 3, 2013

Danish Heart Baskets

This year for Valentine's Day I am making Danish Heart Baskets (typically made for Jul (or Christmas) in Denmark). Last night at work I found myself utterly bored out of my mind with my co-workers and decided to start making a heart basket. None of them had ever seen it before, and I always thought everyone knew how to make them. They're very simple once you get it down but it can take a few times before you get it right. At least that's what I learned from teaching one of my co-workers who wanted to learn how to make them last night. But after a couple of tries he was able to make them on his own and they looked better than mine! 
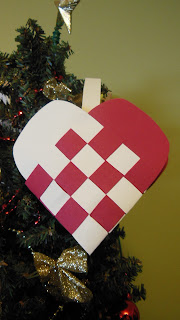

My grandma was born in Denmark but moved to the U.S. when she was still a baby. Her parents carried on many Danish traditions and over the years she has shared some with me. I can remember making these baskets with her when I was young, probably five or six, and we always make then in red and white glossy paper. The flag of Denmark is red and white so that's where the tradition came from. But I've seen other colors used, typically red is one of them though. 

MAKING THE BASKETS:

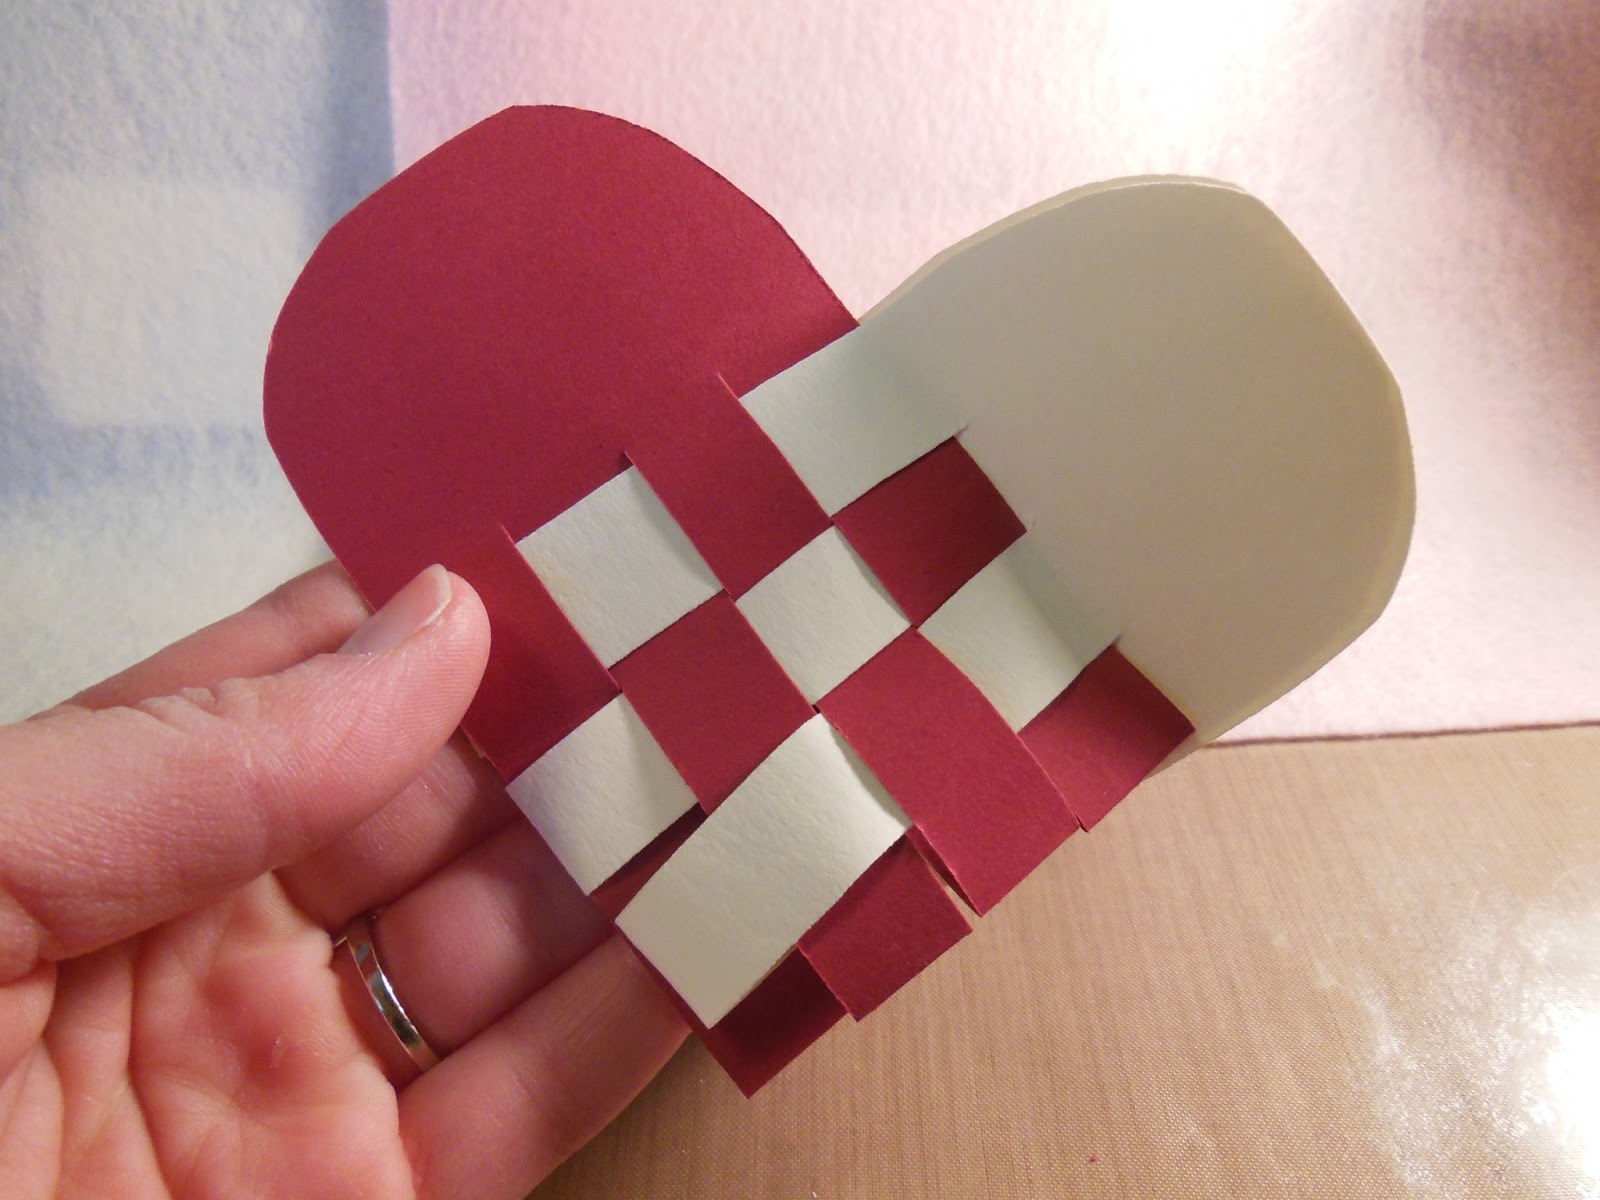
The first row is the easiest to weave, with the last being the hardest. This has to do with the fact that you have so much more room for your rows to move around in the beginning but as you near the end you have virtually no wiggle room. There are a few different ways to make the hearts to get differing patterns but I will show you the more basic of the designs. Using three rows is the easiest to begin with, I believe that is what I was initially taught with. Then you can add four or five rows. They get more time consuming and harder to weave as you increase the row amount. I will show you a four row Danish Heart Basket using red and white construction paper.


Start with two long ovals folded in half and cut 3 strips into each one starting at the fold and going towards to rounding top. Make sure your cuts are AT LEAST as long as your oval is wide (otherwise you won't be able to weave all of your rows and make them fit). 

*Remember your ovals are folded in half and cut, so there are TWO layers to them when they're folded. This is how you are able to weave the strips IN and OVER of each other to make a basket that will open up at the end. Be sure to weave IN and OVER, not just over and under.*


Take your white oval and open up the first strip and put it OVER the(1st)  red strip (red is INSIDE the white).


Take the same white strip and thread it IN BETWEEN the (2nd) red strip.


Take the same white strip and put it OVER the (3rd) red strip (red INSIDE white).


To finish your first row, thread your white strip IN BETWEEN the last (4th) red strip. 

Then scoot the entire first row up to make room for your next row.


Take your 2nd strip of white...


Thread it INSIDE the (1st) red strip (white INSIDE red)


Take the same (2nd) white strip and put it OVER the (2nd) red strip (red IN BETWEEN white)


Take the same white strip and thread it IN BETWEEN the (3rd) red strip (white INSIDE red)


To finish the second row, put the white strip OVER the red (red INSIDE of white)


This is what it will look like after the 2nd row is complete


For the 3rd row, take the 3rd white strip and put it OVER the 1st red strip ( so that red is IN BETWEEN white)


Take the same 3rd white strip, and thread it through the 2nd red strip (so white is IN BETWEEN red).

Then continue the pattern weaving in and out to finish the 3rd row. 

3rd white over red (so red is in between white)
3rd white in between red (so white is in between red)

Now to start the last (4th) row:


Thread the last (4th) white strip through the 1st red strip (white IN BETWEEN red)

And then continue the pattern:
White strip over 2nd red
White strip through 3rd red
White strip over 4th red


(This is right before you thread the last white strip over the 4th red strip) 


This is your final product!


You should be able to open it up and fit some goodies inside now!

You can add a thin strip from the middle of each side of the Heart Basket with adhesive so that it can hang.

Hope this tutorial is easy enough to understand. Happy Crafting, and Happy Valentine's Day!


Monday, February 7, 2011

A Vintage Valentine


Supplies:
Core-dinations (brown)
G45 Wedding
Tim Holtz Seasonal Paper (Valentines Day)
Spellbinders Pendant
Spellbinders Fancy Tags
Tim Holtz Memo Pin
Tim Holtz Antique Linen Distress Ink
Pearls
White/Off-white/Brown Buttons
Red CS
Scrap Paper (any color you want) for the flowers

Techniques:
For the flowers, just cut a circular shape (it doesn't have to be perfect at all) out of your scrap paper, between 1.5-2.5" in diameter. Begin cutting a spiral out of the circle until you reach the middle of the circle; you can cut off the ball the ends up on the end of the spiral so  that you end up with a point at the end. Curl the paper in on itself from the center of the spiral to the outside. Curl into the side of the paper that you want the flower to end up being. Have the one you don't want shown on the outside. You can keep  it curled tight or not if you choose; the tighter the curling, the smaller the flower may end up. After you've curled to the middle, let the flower unravel until you think it's a good size for your project. Smash the flower with a flat-bottomed jar or something of the sort. I like to put a little glue at the end of the flower so that it doesn't continue to unravel before it's on your project. Apply to project!

Saturday, January 29, 2011

Love Birds

Supplies:
Divine Swirls CB embossing folder
CB Quilling Set (flower)
Spellbinders Large Scalloped Circle
MME "Share Love" Die Cut
MME "Fine & Dandy" (blue plaid)
Tim Holtz Vintage Photo Distress Ink
Light Fairytale Pink CS
Forest Green CS

Friday, January 28, 2011

Happy Vday!


HAPPY VALENTINE'S DAY. Only a little bit early...Both of these cards are mini cards meant for a quick note for Vday. They stand about 3x4". The second one opens up after you untie the ribbon to say Happy Valentines Day hidden beneath the polka dotted paper.

Wednesday, January 19, 2011

Fab 5 Day 3- January


A mini card today! A love bird and his bird house asking you to be his valentine.

Supplies:
Bird, birdhouse, "Be My Valentine" Judith Stamps

My Mind's Eye Paper (Tres Jolie)
Sizzix "Tattered Floral" Big Die